Services
Exterior Painting
When it comes to painting or staining the outside of your house, there is no substitute for thorough preparation of your siding and the use of high-quality paints and stains. We pride ourselves in taking time to prepare your house for paint the right way, the first time.
We are experts in paint and will educate you on your options and in most cases we recommend the best paint available! Since most of the cost of painting your house is the labor, why not use the best product on the market? Because of our commitment to using quality products, we paint more houses with Sherwin Williams Paints than anybody else!
It is not uncommon for us to repaint houses after only 6 years because of the quality of the paint or because of poor preparation that so many homes receive. This is so unfortunate because there are paints available today that will last 15+ years when applied correctly by a professional Herinck painter. Keep in mind, all colors fade over time to some degree and certain environmental factors such as sprinklers, lack of gutters, and siding failure can cause premature paint failure.
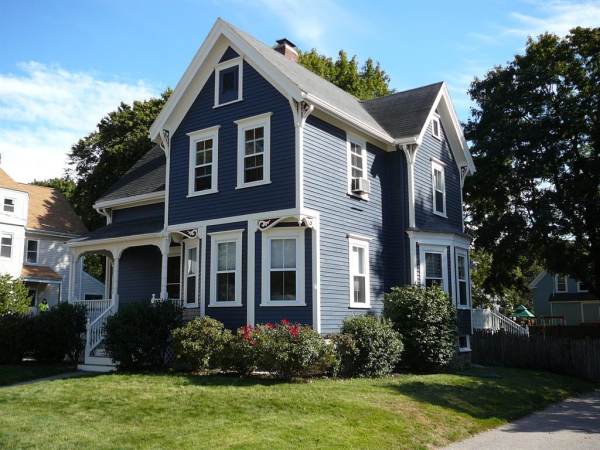
Blue Exterior, Crisp White Trim
Our Process
We start each exterior repaint by washing the outside of your home with either low or high pressure depending on the characteristics of the siding.
Next, our painter will address all the areas on your house needing scraped, sanded, primed, and finally caulked. Typically, we re-caulk the facia, soffit, corners, windows and any other areas where the original caulking has failed including nail holes and around windows where applicable. We brush and roll your house with primer to create a good foundation for the top coat of paint to adhere to. This results in us often giving your home as many as 3 – 4 coats of paint!
After the home has been thoroughly cleaned and prepped, we apply 1 – 2 coats of high quality exterior paint depending on the condition of the siding and previous coating; however, we always apply the paint at the recommended film thickness to optimize the performance of the coating. This often includes back rolling surfaces as needed.
Back rolling and back brushing is a technique where the paint is applied to the surface with the sprayer, and then is brushed or rolled in order to help the paint penetrate the surface further. This is helpful on surfaces such as stucco, rough wood, concrete and siding with cracks and splits. Each home requires a little different approach to ensure that we give you a quality paint job that will last as long as possible!
After the body of your home is painted, we follow by brush and rolling all your trim, facia, door wraps, etc. according to your color specifications. This often gives your trim an ADDITIONAL 1 – 2 coats of paint, which increases performance in that area even more!
Finally, we finish by spraying your gutters to match your trim with a fine finish tip to maintain the factory finish look of your gutters if you have chosen this option. We also offer a service of painting your front door a unique color with a specialty durable satin or semi gloss enamel using a fine finish tip that can give your house an extra pop of color.
Before our job is done we clean up after ourselves, do any final touch up that is needed, and do our best to leave your property cleaner than we found it!
Interior Painting
We know that hiring a contractor to work inside your home requires a lot of trust! So we take pride in a team with exceptional integrity and simply put: people you will feel comfortable working inside your home. In addition, all of our employees are background checked.
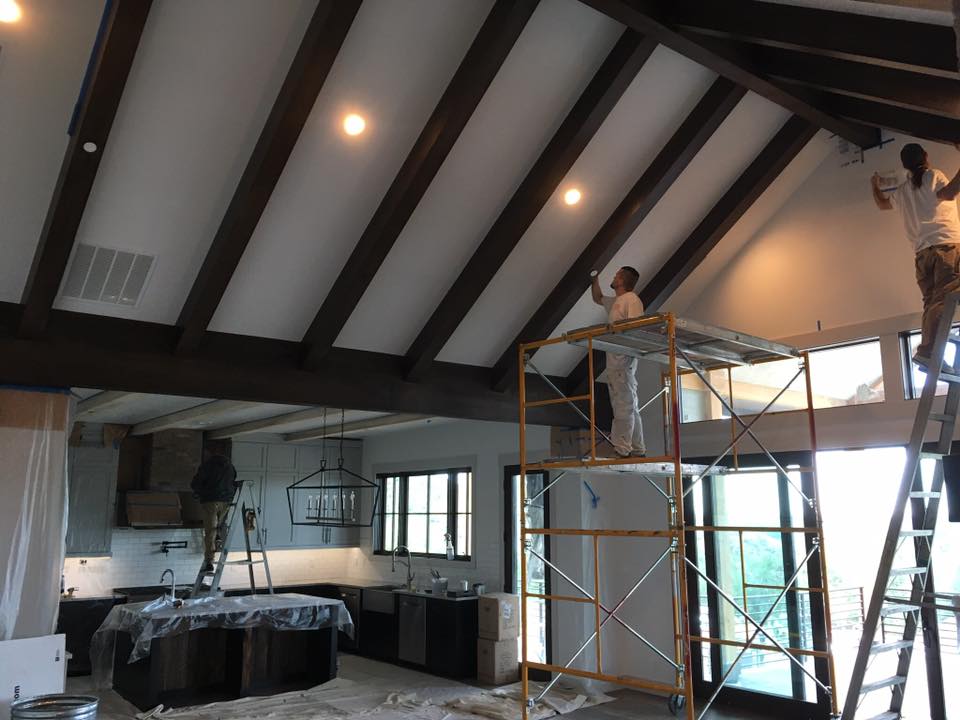
Painting the ceiling in new home
Our Process
You can expect Herinck Painting to be a very respectful, friendly, clean and skilled. This includes brushing and rolling paint or spraying depending on the project and your preference. If you are currently living in the home, we customize a plan that best fits your needs. This can vary from using a basic brush and roll technique throughout your home to breaking up the project into different stages and completing a full interior repaint, one section at a time. This approach allows us to paint one side of your home while you live in the other side.
While we can just paint a room or two for you, our most common interior painting project is a home that was just purchased and is ready for a complete interior painting makeover!
If We Have An Empty Home Ready For Painting We Typically Follow These Steps:
- First of all we cover all the floors, window, vanities, railings, counters, etc. so that all of the non-painted surfaces stay protected.
- Then, we lightly sand and clean all of the trim and doors in the house and after caulking all the cracks we spray two coats of a durable semi-gloss enamel on the trim and doors. Initially, many people don’t think we need to paint the trim, but doing so really gives the project a finished new home feel.
- After the trim and doors are finished, we fill all the nail holes and cracks and re texture as needed. We also use a stain blocking primer on areas as needed to seal out smoke, crayon or markers, and any other unidentifiable markings!
- Once the walls have been thoroughly prepped, we apply as many coats of paint as necessary to create a beautiful finish on the walls. We usually use a low sheen or eggshell finish unless otherwise specified.
- For the ceiling we either paint it the same color as the walls or if a different color is chosen such as white, we then mask the walls off and spray the ceiling last.
- Lastly, we clean up all the drops and masking, give your home a final walk through and perform touch up as needed, and do our best to leave your home cleaner than we found it!
Wood Staining
Stained wood as an accent inside or outside a painted house can add a warm touch to your home. Whether it’s used on a pergola, a trellis, corbels, a wood front door, a stained handrail, kitchen cabinets, or built-in cabinetry throughout the home, this design feature makes a home stand out in a neighborhood.
Herinck Painting offers both interior and exterior wood staining. While these services may sound similar, they require very different products and techniques.
Exterior Staining
Exterior staining is done to add color and protection from water and the sun in order to preserve the wood elements of your home. These stains provide color and protection in 1-2 coats of the same exterior wood stain.
We prep the wood by doing a combination of power washing, scrubbing clean (using wood cleaners and brighteners), and sanding. Once the wood is properly prepared, we apply the wood stain with either a sprayer or a brush and roller, depending on the situation and surface material. In most cases the wood stain is applied to the point of rejection; we apply it until the wood is fully penetrated.
Most wood stains are not designed to build up a thick film, but instead are designed to penetrate into the wood. However, some solid body stains are designed to be applied more like paint and do build a small film thickness on top of the wood and provide a solid color finish instead of the more traditional semi-transparent finish.
Exterior wood stains come in a range of colors but also in various transparencies. This includes clear or transparent, semi-transparent, semi-solid and solid. Some stains we use for exterior wood staining even come in a satin or semi-gloss finish for unique projects.
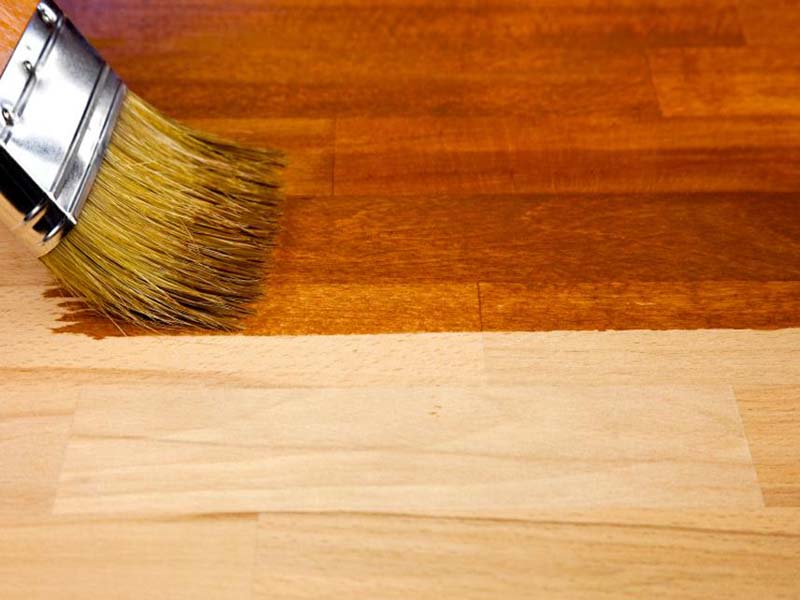
Interior Staining
Interior wood staining is also done to add color, but in most cases relies on a clear coat for the protection, such as lacquers, polyurethanes, polyacrylics or water-based clear coats to create a durable and beautiful sheen and protective layer on top of the wood stain.
For example, kitchen cabinets, stair handrails, wood windows, wood-stained baseboards and window and door trims typically are all stained to simply add color to the wood and then given a clear coat for the finish.
Herinck Painting has a unique resume of both interior and exterior wood staining and we would love to help add a unique style to your home by staining wood inside or outside your home.
Cabinet Painting
Painting your kitchen cabinets is a fantastic way of updating the look of your kitchen for a fraction of the cost of buying new cabinets! There are so many different colors and styles to make your kitchen or bathroom look the way you always dreamed of! Painting your cabinets can give you a more modern look whether you have oak, maple, or some other type of cabinets.
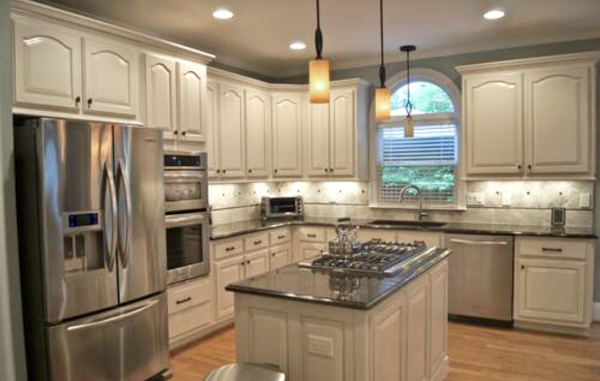
Painting Kitchen Cabinets
Why Choose Us?
We have developed a unique process that allow us to create an excellent bond to your current cabinets and finish with a long lasting smooth top coat that is both washable and durable. Best of all, you can choose any color to give you just the right look. We can also do special effects such as glazing to give you a more rustic or worn look. While many homeowners attempt to paint their cabinets on there own, it is a technical process and we’ve seen our fair share of kitchen projects gone bad! If your goal is a clean, smooth and durable cabinet finish, kitchen cabinet refinishing is better left to a professional. We have an outstanding reputation for painting and refinishing cabinets of all kinds.
Garage Epoxy Floor Coatings
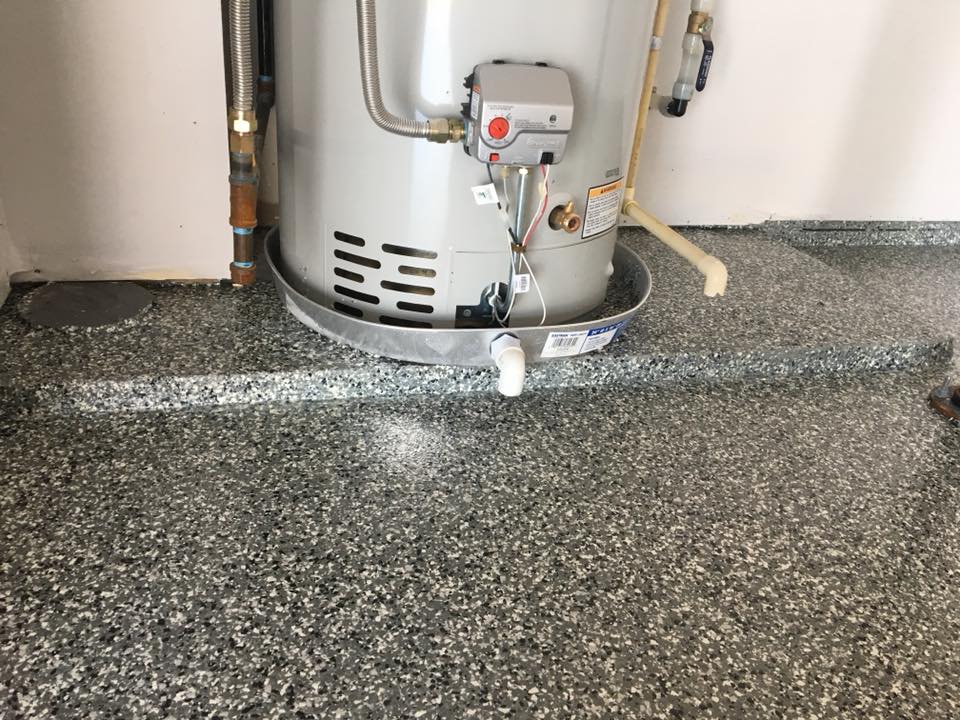
It’s pretty amazing to see how something as simple as a garage floor epoxy coating can transform your garage from dirty and drab feeling to presenting a finished, colorful, clean showroom look.
With plenty of different options available, Herinck Painting can help you pick a color and floor style that gives you the look, protection and cleanability you’ve wanted.
The first thing to know about garage floor epoxy coatings is that there is a wide variety of coatings available, and they are not all created equally.
Our Choice: 100% Solids Epoxy
The type of epoxy garage floor coating that we recommend is a commercial grade 100% solids epoxy that we apply using a trowel or squeegee. Yes, it is that thick! Once we have used our diamond bit grinder to create the proper profile on your concrete, we clean up the dust and apply the epoxy as either a top coat or a primer/base coat if we are broadcasting color flakes into it. After spreading the color chips to the point of rejection—which means we have covered the floor with so many color chips you can’t even see the base coat of epoxy—we clean up the excess chips once the coating dries.
Then we apply the top coat of polyaspartic to the floor. This is a product that is similar to epoxy but has better UV stability; it won’t yellow and is highly chemical- and abrasion-resistant. Epoxy coatings bond extremely well to concrete but tend to yellow and chalk when exposed to sunlight. So in the case of a garage, every time the garage door is opened the floor gets sunlight and so that part of the garage often will yellow and become chalky over time. Using our polyaspartic finish as the clear coat or colored coat for the final step solves that problem.
WE CAN HELP
Our garage floor epoxy coatings come in a huge range of colors and designs. This includes quartz floors instead of the color chips, as well as metallic floors for that unique look. Request a free quote to hear more about how we can help you transform your garage into a space you will enjoy to look at and be organized in.
Moss Treatments for Roofs
- We first remove the large clumps of moss with a gentle scrape of the 3 tab, composite, asphalt, fiberglass, or laminated shingles. (removing the moss that stands around a centimeter or taller)
- Then we blow the loose debris off the roof and eaves.
- We then apply the moss treatment to the roof’s surface (valleys, eaves, hips and ridges). The remaining moss will dehydrate and become brittle, eroding off the roof, making the shingles look nice again. This terminates, eliminates, and inhibits the future growth of moss and the spores for 9 months to even a few years. Averaging 1 to 2 years depending on the tree shade, exposure to the sun, and harshness of the winter weather.
- We then clean the gutters (Gutters cleaning is a separate charge) and tidy up the yard.
- This treatment will not hurt the plants or pets around the house.
- Once it rains you will see discoloring after about 10 days to 2 weeks and then the process is on it’s way to start the treating.
- Allow about 8-13 weeks from the first rain to notice that all the moss and treatment is gone and your roof shingles looks great. In the Summer months it works just as well but can take longer because of less rain.
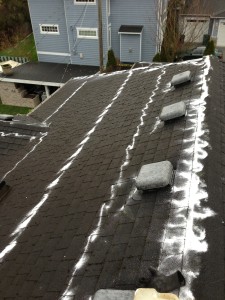
Moss Treatment for Your Roof
*Moss removal and treatment can be done anytime of the year and in most cases should be done annually or every other year. Gutter cleaning is needed along with the moss removal and the treatment process. Late fall (November on) is a great time to schedule moss removal and the treatment since your gutters need cleaning at that time of year from the last of the leaves falling.
*We never under any circumstances pressure wash composite shingles or an asphalt roof. We only pressure wash slight pitched metal roofs for safety reasons.